Spring Security - 土炮法
今天想要跟大家介紹的是 Spring Security ,在介紹之前,我們需要先知道,目前的程式的主流架構已經都是採用前後端分離的架構,當採用了前後端分離的架構時,後續衍生的『身份認證』就變成一個重要的課題了。
今天要跟大家講的是使用無狀態的jwt機制。詳細的jwt介紹大家可以參考Wiki 。
在 Spring 強大的 Carry 之下,Spring Security 是我們的不二人選。
Spring Security is a powerful and highly customizable authentication and access-control framework. It is the de-facto standard for securing Spring-based applications.
Spring Security is a framework that focuses on providing both authentication and authorization to Java applications. Like all Spring projects, the real power of Spring Security is found in how easily it can be extended to meet custom requirements
Quick Start Spring Security 這次介紹給大家的方法我把它叫做『土炮法』。
在開始之前,我們先預期一下我們接下來實作後會出現的效果,我希望有一隻login的 api,提供給帳號密碼的登入來換取token,後續其他的 api 都將採用token的認證方式進行授權放行。
加入 Spring Security 設定
首先我們需要在我們的pom.xml中加入我們需要的 dependency。
1
2
3
4
5
6
7
8
9
10
11
12
13
14
15
16
17
18
<dependency> <groupId>org.springframework.boot</groupId> <artifactId>spring-boot-starter-web</artifactId> </dependency> <dependency> <groupId>org.springframework.boot</groupId> <artifactId>spring-boot-starter-security</artifactId> </dependency> <dependency> <groupId>com.spring4all</groupId> <artifactId>swagger-spring-boot-starter</artifactId> <version>1.8.0.RELEASE</version> </dependency> <dependency> <groupId>io.jsonwebtoken</groupId> <artifactId>jjwt</artifactId> <version>0.9.1</version> </dependency>
建立 Main Class:Applicatioin.java,需要啟用@EnableWebSecurity
1
2
3
4
5
6
7
8
@SpringBootApplication @EnableWebSecurity public class Application { public static void main(String[] args) { SpringApplication.run(Application.class, args); } }
建立 WebSecurityConfig 繼承 WebSecurityConfigurerAdapterJwtAuthenticationFilter,且允許 URI Path /auth/** 不需要認證就可以通過。
1
2
3
4
5
6
7
8
9
10
11
12
13
14
15
16
17
@Override protected void configure(HttpSecurity http) throws Exception { http.cors() .and() .csrf().disable() .addFilterBefore(jwtAuthenticationFilter(), UsernamePasswordAuthenticationFilter.class) .exceptionHandling() .authenticationEntryPoint(unauthorizedHandler) .and() .sessionManagement() .sessionCreationPolicy(SessionCreationPolicy.STATELESS) .and() .authorizeRequests() .antMatchers("/auth/**").permitAll() .anyRequest().authenticated(); }
建立 JwtAuthenticationFilter 繼承 OncePerRequestFilter
1
2
3
4
5
6
7
8
9
10
11
12
13
14
15
16
17
18
19
20
21
22
23
24
25
26
27
28
29
30
31
32
@Override protected void doFilterInternal(HttpServletRequest request, HttpServletResponse response, FilterChain filterChain){ try { String jwt = getJwtFromRequest(request); if (StringUtils.hasText(jwt)) { if (tokenProvider.validateToken(jwt)) { String usernmae = tokenProvider.getUsernameFromJWT(jwt); UserDetails userDetails = customUserDetailsService.loadUserByUsername(usernmae); UsernamePasswordAuthenticationToken authentication = new UsernamePasswordAuthenticationToken(userDetails, null, userDetails.getAuthorities()); authentication.setDetails(new WebAuthenticationDetailsSource().buildDetails(request)); SecurityContextHolder.getContext() .setAuthentication(authentication); } } filterChain.doFilter(request, response); } catch (Exception ex) { logger.error("Could not set user authentication in security context", ex); } } private String getJwtFromRequest(HttpServletRequest request) { String bearerToken = request.getHeader("Authorization"); if (StringUtils.hasText(bearerToken) && bearerToken.startsWith("Bearer ")) { return StringUtils.delete(bearerToken, "Bearer "); } return null; }
建立 JwtTokenProvider,token的實作
1
2
3
4
5
6
7
8
9
10
11
12
13
14
15
16
17
18
19
20
21
22
23
24
25
26
27
28
29
30
private String tokenBuilder(String username) { Date now = Calendar.getInstance().getTime(); Date expiryDate = new Date(now.getTime() + JWT_EXPIRATION_MS); return Jwts.builder() .setIssuer(ServletUriComponentsBuilder.fromCurrentContextPath() .build() .toUriString()) .setSubject(username) .setIssuedAt(now) .setExpiration(expiryDate) .signWith(SignatureAlgorithm.HS512, JWT_SECRET) .compact(); } public String getUsernameFromJWT(String token) { try { logger.info("get token:{}", token); Claims claims = getClaimsFromToken(token); return claims.getSubject(); } catch (ExpiredJwtException ex) { return ex.getClaims().getSubject(); } } private Claims getClaimsFromToken(String token) { return Jwts.parser() .setSigningKey(JWT_SECRET) .parseClaimsJws(token) .getBody(); }
建立 UserPrincipal,實作 UserDetails
1
2
3
4
5
6
public static UserPrincipal create(String username) { UserPrincipal user = new UserPrincipal(); user.setUsername(username); user.setPassword("password"); return user; }
AuthController1 2 3 4 5 6 7 8 9 10 11 12 13 14 15 @Api(tags = "帳號權限相關操作") @RestController @RequestMapping("/auth") public class AuthController { @Autowired private JwtTokenProvider jwtTokenProvider; @ApiOperation(value = "登入") @PostMapping(value = "/login") public ResponseEntity login(@RequestBody LoginReq loginReq) { String jwt = jwtTokenProvider.generateToken(loginReq.getUsername()); return ResponseEntity.ok(jwt); } }
UserController1 2 3 4 5 6 7 8 9 10 11 @Api(tags = "使用者相關操作") @RestController @RequestMapping("/user") public class UserController { @ApiOperation(value = "使用者資訊") @GetMapping(value = "/info") public ResponseEntity info(@ApiIgnore @CurrentUser UserPrincipal currentUser) { return ResponseEntity.ok(currentUser.getUsername()); } }
建立 JwtAuthenticationEntryPoint,實作 AuthenticationEntryPoint
1 2 3 4 5 6 7 8 @Override public void commence(HttpServletRequest httpServletRequest, HttpServletResponse httpServletResponse, AuthenticationException e) throws IOException, ServletException { logger.error("Responding with unauthorized error. Message - {}", e.getMessage()); httpServletResponse.setStatus(HttpServletResponse.SC_UNAUTHORIZED); httpServletResponse.setHeader("Content-Type", "application/json;charset=UTF-8"); }
加入 Swagger 設定
在 Main Class 加入 @EnableSwagger2
1 2 3 4 5 6 7 8 9 @SpringBootApplication @EnableSwagger2 @EnableWebSecurity public class Application { public static void main(String[] args) { SpringApplication.run(Application.class, args); } }
1 2 3 4 5 6 7 8 9 10 11 12 13 14 15 16 17 18 19 20 21 22 23 24 25 26 27 28 29 30 31 32 33 34 35 @Bean public Docket createRestApi() { return new Docket(DocumentationType.SWAGGER_2) .apiInfo(apiInfo()) .select() .apis(RequestHandlerSelectors.basePackage("com.grd")) .paths(PathSelectors.any()) .build() .securitySchemes(Lists.newArrayList(apiKey())) .securityContexts(Arrays.asList(securityContext())); } private ApiKey apiKey() { return new ApiKey("Authorization", "Authorization", "header"); } private SecurityContext securityContext() { return SecurityContext.builder().securityReferences(defaultAuth()) .forPaths(PathSelectors.any()).build(); } private List<SecurityReference> defaultAuth() { AuthorizationScope authorizationScope = new AuthorizationScope( "global", "accessEverything"); AuthorizationScope[] authorizationScopes = new AuthorizationScope[1]; authorizationScopes[0] = authorizationScope; return Arrays.asList(new SecurityReference("Authorization", authorizationScopes)); } private ApiInfo apiInfo() { return new ApiInfoBuilder() .title("SSSample") .description("SSSample") .build(); }
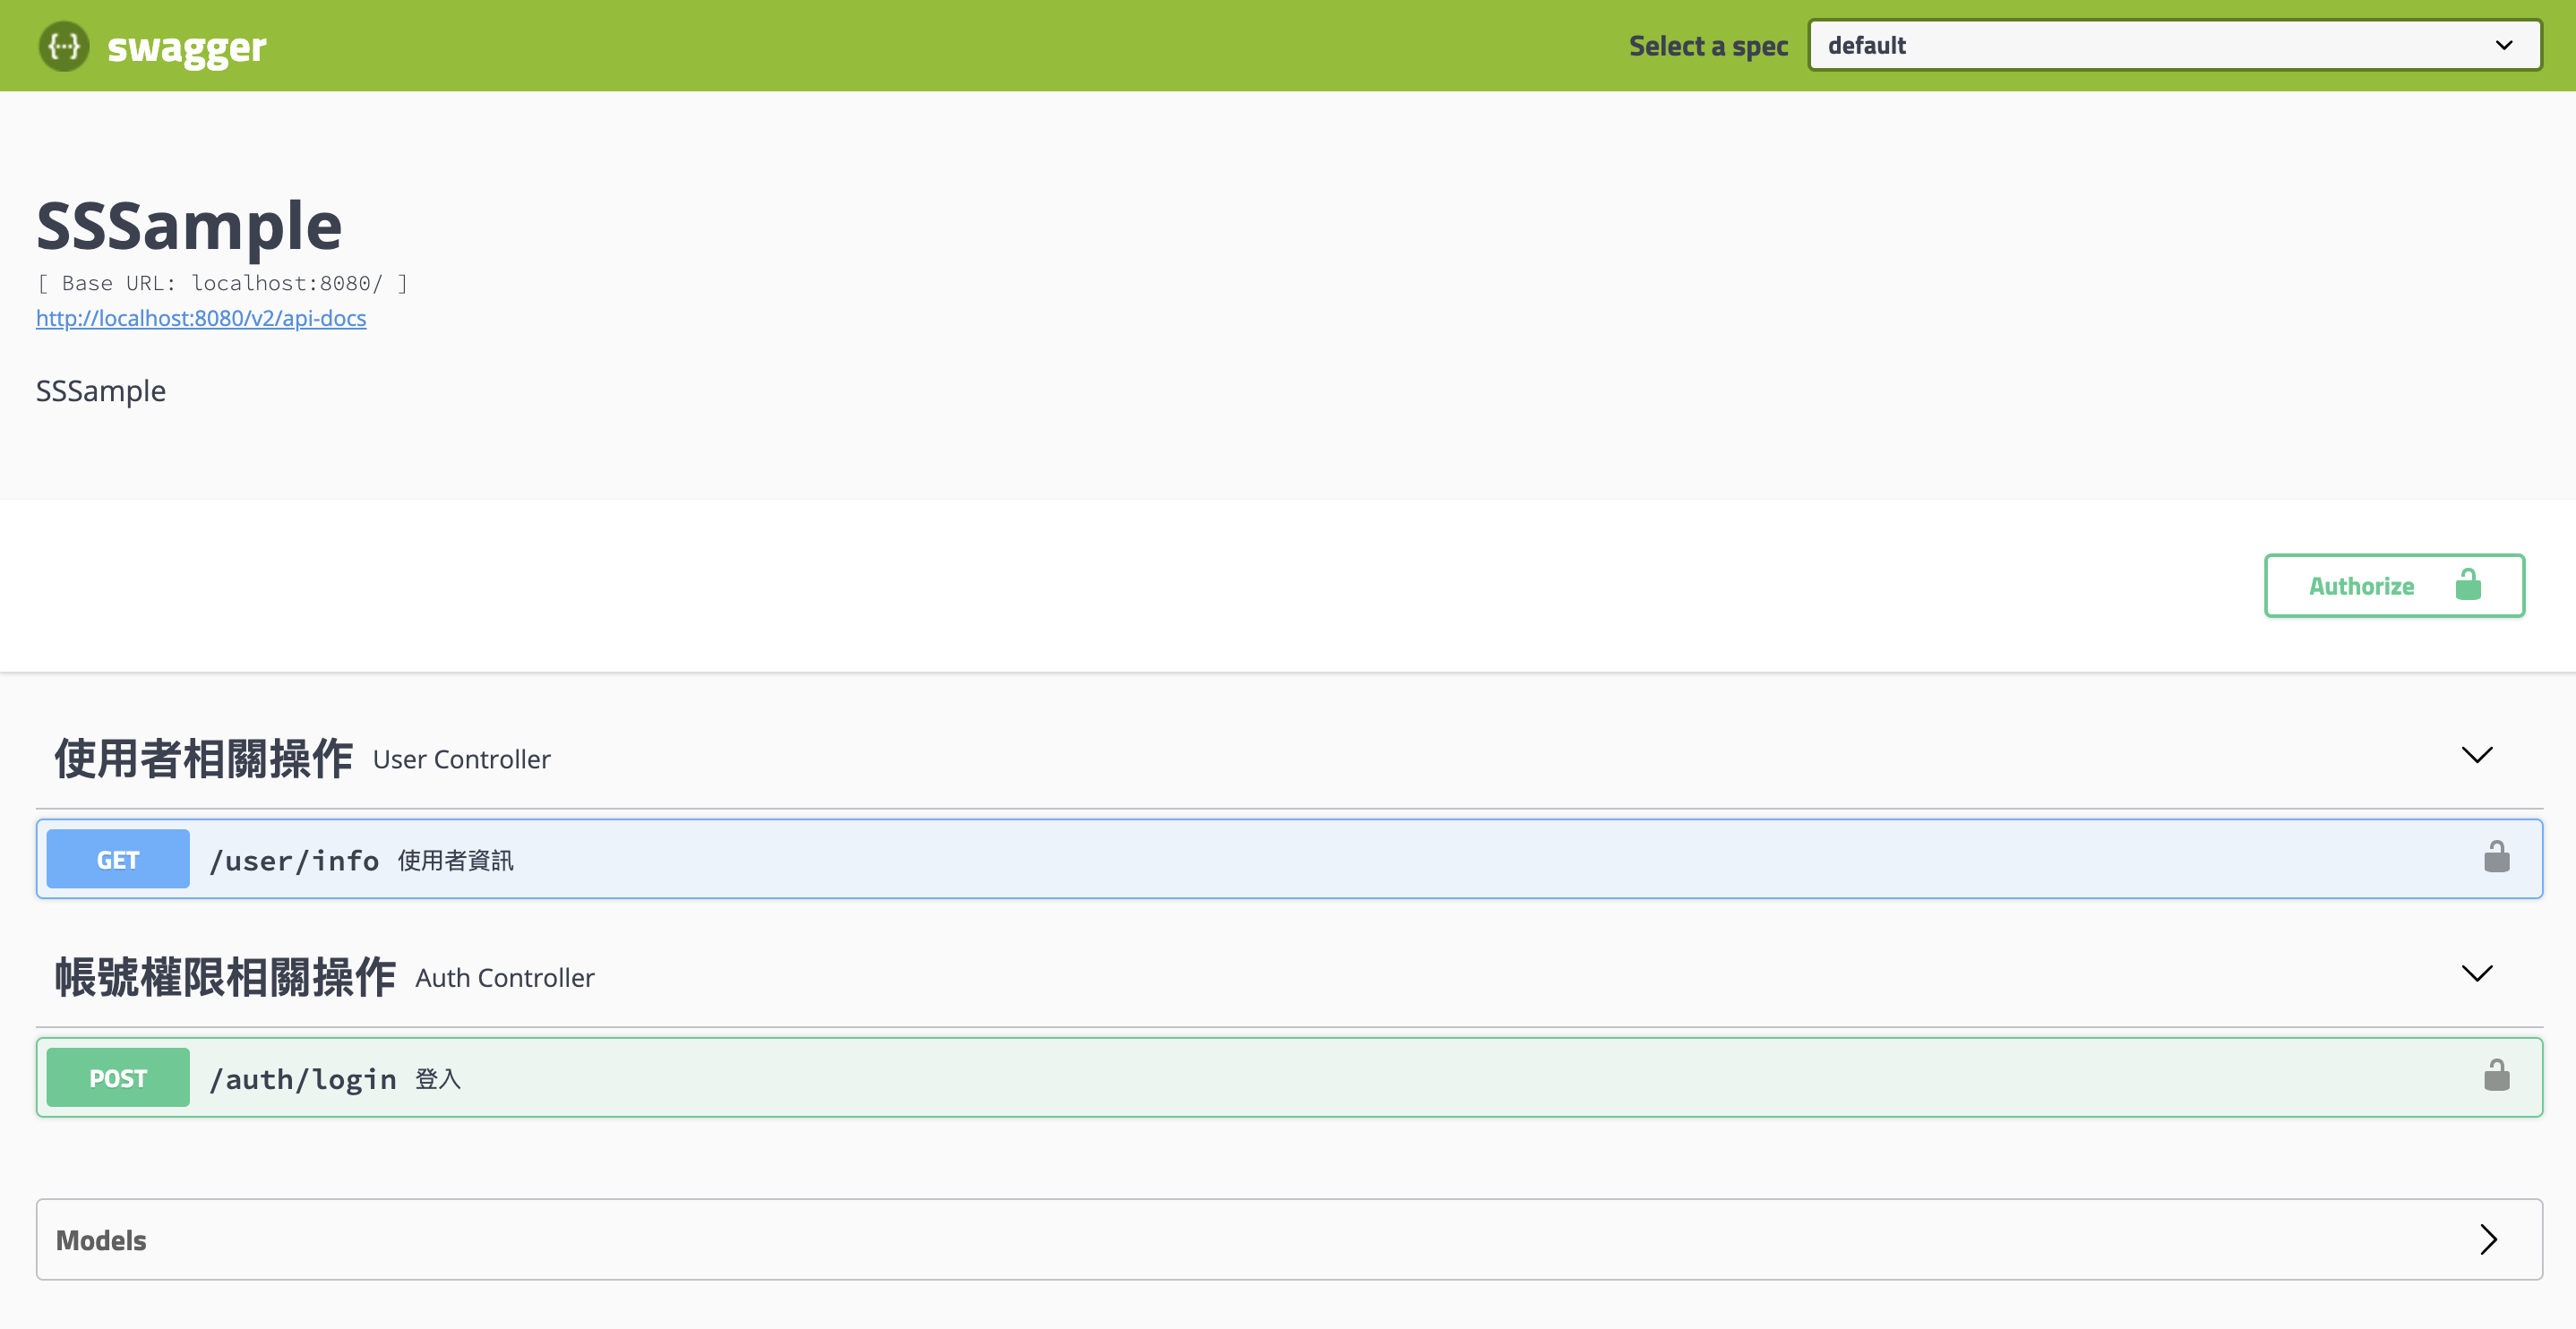
驗證 http://localhost:8080/swagger-ui.html
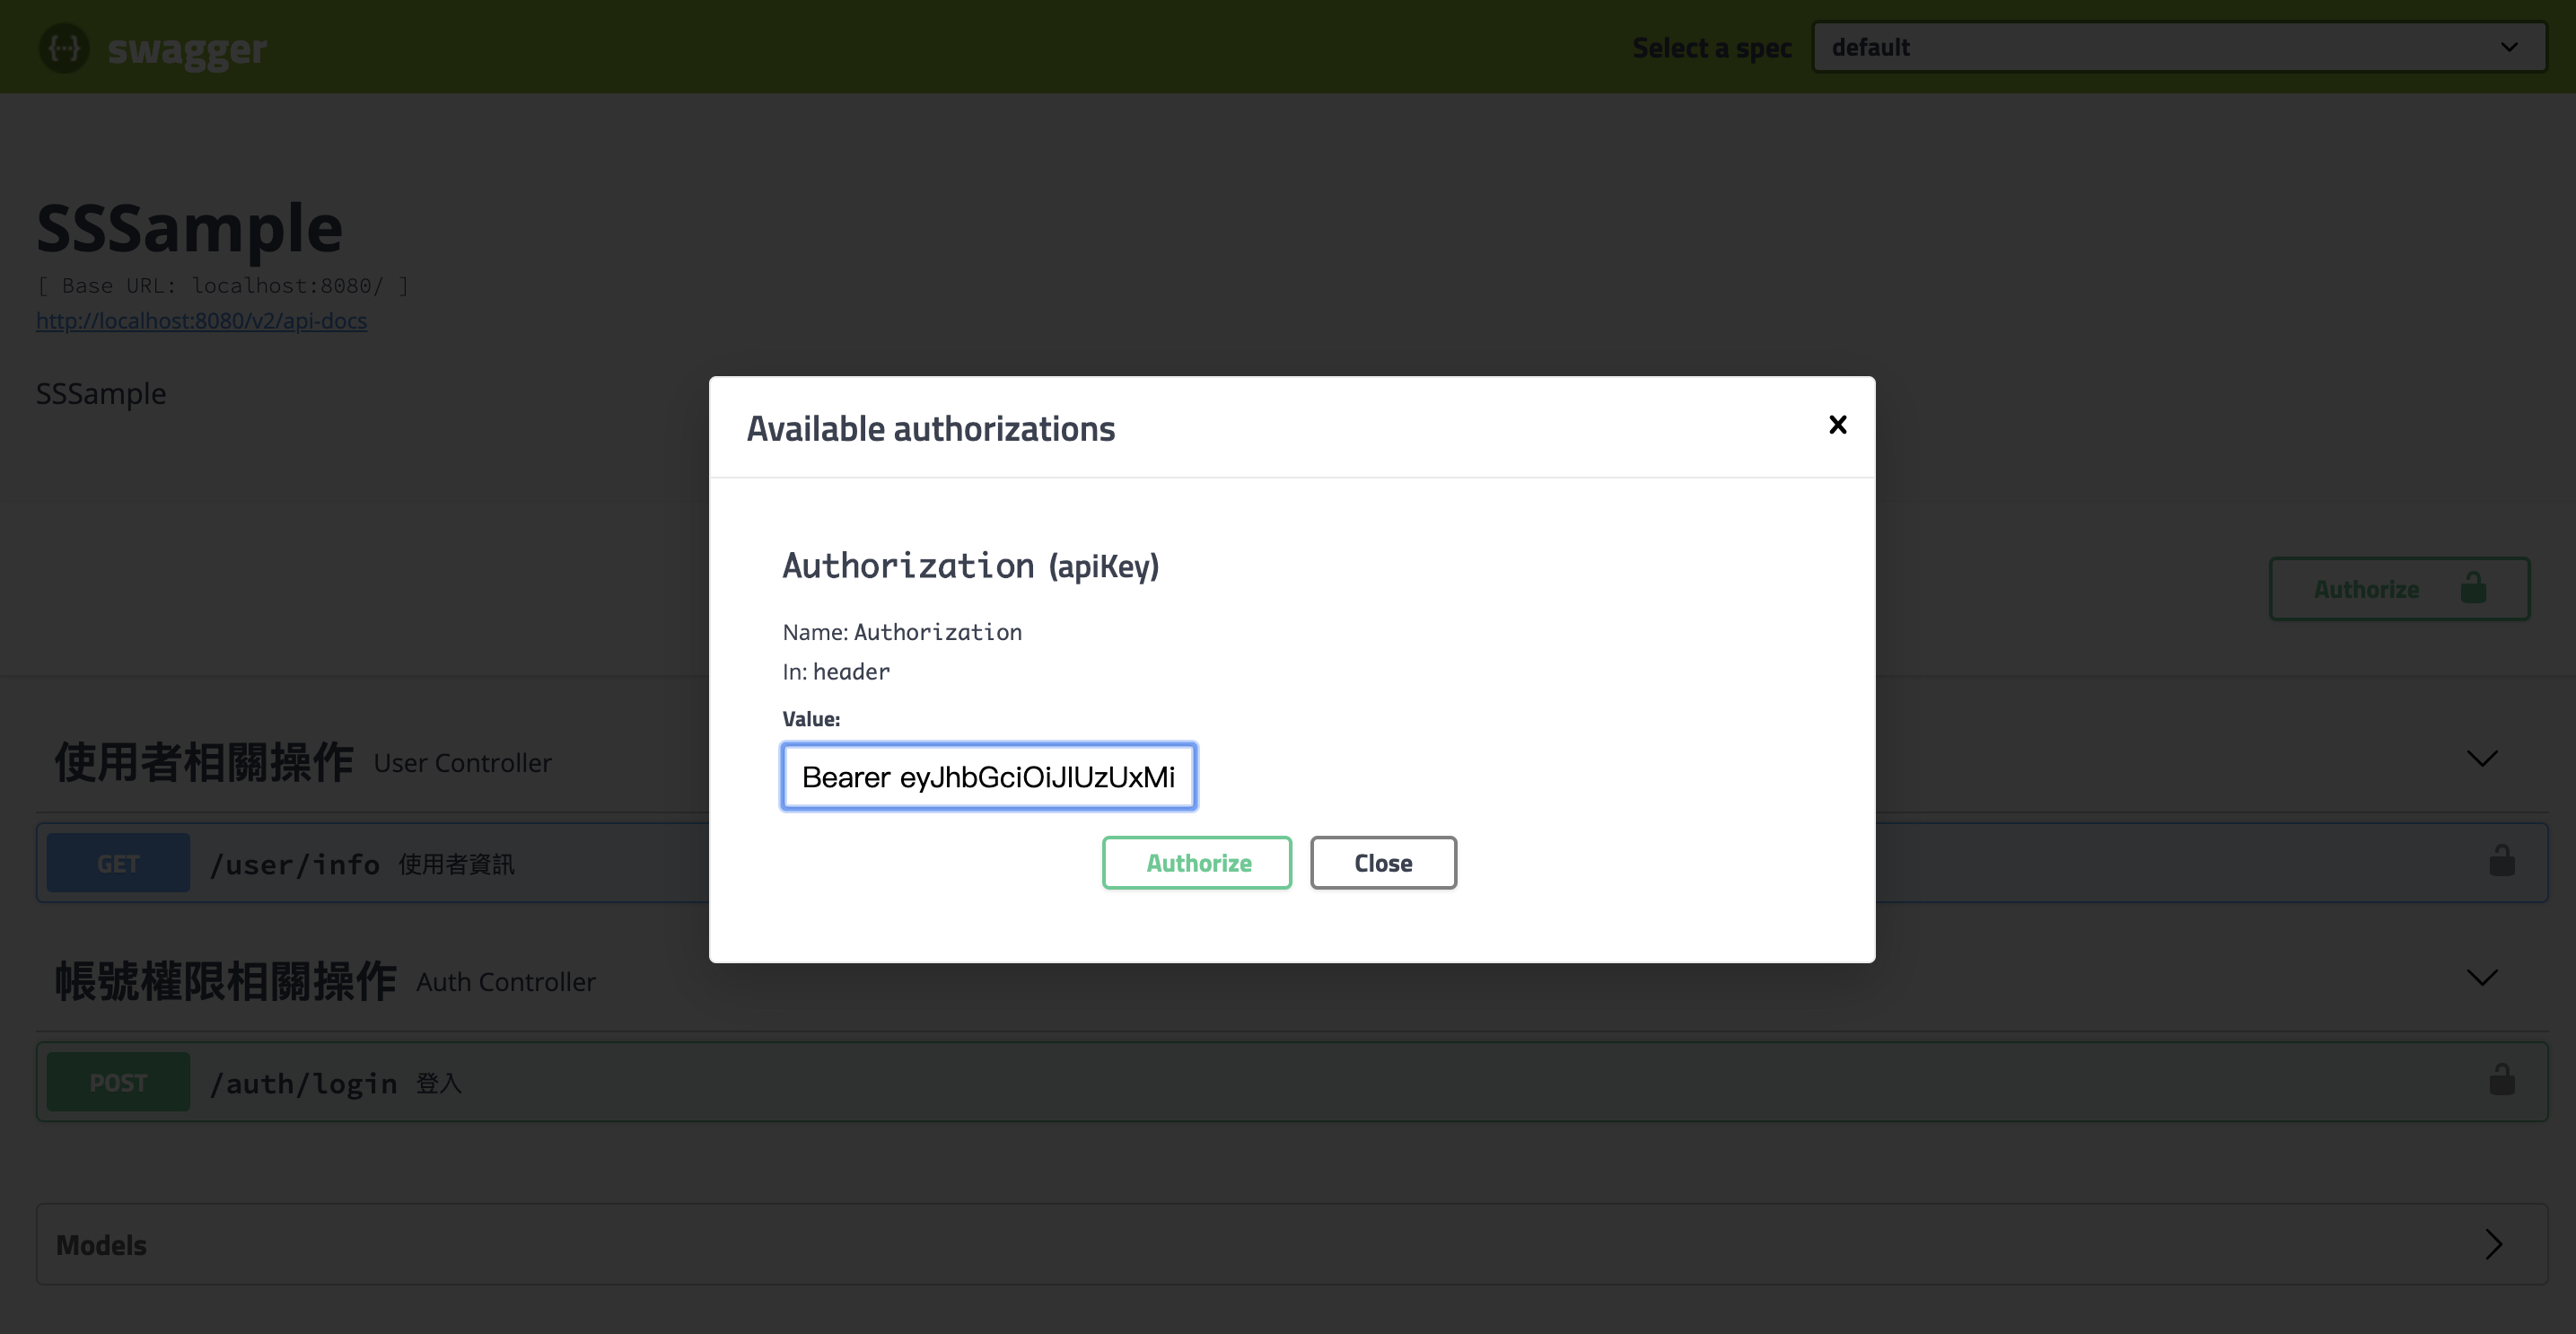
輸入 Authorization
Reference Sample Code
Donate
謝謝您的支持與鼓勵
Ads

