Spring Security - Oauth2
今天要跟大家介紹 Spring Security Oauth2 ,前一章跟大家介紹的Spring Security - 土炮法,在實作的時候就發現,難道 Spring Security 沒有提供標準的token做法嗎?登入換取token,token到期須更新新的token,難道這沒有所謂的標準動作嗎?後來再去找,發現我想要的效果就是 Spring Security Oauth2 了。
在開始之前,大家可能需要先了解一下 Oauth2 的基本概念,Oauth2分成4種方式,這次主要是跟大家介紹其中的password模式。
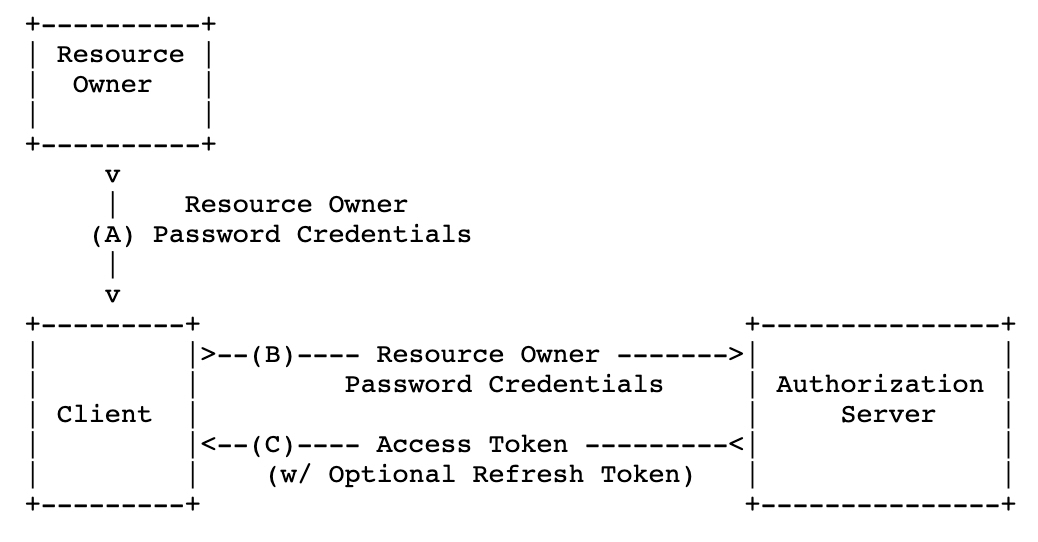
下圖節錄IETF中:
(A) The resource owner provides the client with its username and
password.(B) The client requests an access token from the authorization
server’s token endpoint by including the credentials received
from the resource owner. When making the request, the client
authenticates with the authorization server.(C) The authorization server authenticates the client and validates
the resource owner credentials, and if valid, issues an access
token.
簡單的說,就是會有個認證 Server,當客戶端需要進行認證時,需要像認證 Server 提供帳號密碼資訊換取token做後續的訪問。
Quick Start
這次的[Demo]為了簡化流程我們先將 Authorization Server 與 Resource owner 進行合併。
加入 Spring Security 設定
- 首先我們需要在我們的
pom.xml中加入我們需要的 dependency。
1 | <dependency> |
- 建立 Main Class:
Applicatioin.java,需要啟用@EnableWebSecurity
1 | @SpringBootApplication |
- 建立
WebSecurityConfig繼承WebSecurityConfigurerAdapter
允許 URI Path /oauth/* 不需要認證就可以通過。1
2
3
4
5
6
7
8@Override
protected void configure(HttpSecurity http) throws Exception {
http
.requestMatchers().anyRequest()
.and()
.authorizeRequests()
.antMatchers("/oauth/*").permitAll();
}
認證邏輯判斷在 customUserDetailsService1
2
3
4@Override
protected void configure(AuthenticationManagerBuilder auth) throws Exception {
auth.userDetailsService(customUserDetailsService);
}
- 建立
OAuth2AuthorizationServerConfigJwt繼承AuthorizationServerConfigurerAdapter
設定clientId, secret, grant_type, scopes 與 token 期限資訊。1
2
3
4
5
6
7
8
9
10@Override
public void configure(final ClientDetailsServiceConfigurer clients) throws Exception {
clients.inMemory()
.withClient(clientAdmin)
.secret(passwordEncoder().encode(clientAdminSecret))
.authorizedGrantTypes("password", "refresh_token")
.scopes("read", "write")
.accessTokenValiditySeconds(jwtAccessTokenValiditySeconds)
.refreshTokenValiditySeconds(jwtRefreshTokenValiditySeconds);
}
configure 可以設定 token 的儲存方式或是擴充…等。1
2
3
4
5
6
7
8
9@Override
public void configure(final AuthorizationServerEndpointsConfigurer endpoints) throws Exception {
final TokenEnhancerChain tokenEnhancerChain = new TokenEnhancerChain();
tokenEnhancerChain.setTokenEnhancers(Arrays.asList(tokenEnhancer(), accessTokenConverter()));
endpoints.tokenStore(tokenStore())
.tokenEnhancer(tokenEnhancerChain)
.userDetailsService(customUserDetailsService)
.authenticationManager(authenticationManager);
}
tokenService 這邊使用 DefaultTokenServices1
2
3
4
5
6
7
8
9
10@Bean
@Primary
public DefaultTokenServices tokenServices() {
final DefaultTokenServices defaultTokenServices = new DefaultTokenServices();
defaultTokenServices.setTokenStore(tokenStore());
defaultTokenServices.setSupportRefreshToken(true);
defaultTokenServices.setTokenEnhancer(tokenEnhancer());
defaultTokenServices.setAuthenticationManager(authenticationManager);
return defaultTokenServices;
}
token 的轉換1
2
3
4
5
6
7@Bean
public JwtAccessTokenConverter accessTokenConverter() {
final JwtAccessTokenConverter converter = new JwtAccessTokenConverter();
converter.setSigningKey(jwtSecret);
converter.setAccessTokenConverter(customClaimAccessTokenConverter);
return converter;
}
- 建立
OAuth2ResourceServerConfig繼承ResourceServerConfigurerAdapter
設定 Resource Server 認證條件1
2
3
4@Override
public void configure(HttpSecurity http) throws Exception {
http.authorizeRequests().anyRequest().authenticated();
}
- 建立
CustomClaimAccessTokenConverter繼承DefaultAccessTokenConverter與實作JwtAccessTokenConverterConfigurer
1 | @Override |
- 建立
CustomTokenEnhancer實作TokenEnhancer
增加 token 參數值1
2
3
4
5
6@Override
public OAuth2AccessToken enhance(OAuth2AccessToken accessToken, OAuth2Authentication authentication) {
final Map<String, Object> additionalInfo = new HashMap<>();
((DefaultOAuth2AccessToken) accessToken).setAdditionalInformation(additionalInfo);
return accessToken;
}
- 建立
CustomUserDetailsService實作UserDetailsService
判斷帳號邏輯可寫在此處1
2
3
4
5
6
7@Override
public UserDetails loadUserByUsername(String username) throws UsernameNotFoundException {
if(username.equals("test")) {
throw new UsernameNotFoundException("not find user");
}
return UserPrincipal.create(username);
}
- 其他如
CurrentUser,JwtAuthenticationEntryPoint,UserPrincipal基本上與『土炮法』一樣。
加入 Swagger 設定
- 在 Main Class 加入
@EnableSwagger2
1 | @SpringBootApplication |
- 增加
SwaggerConfig
1 | @Bean |
驗證
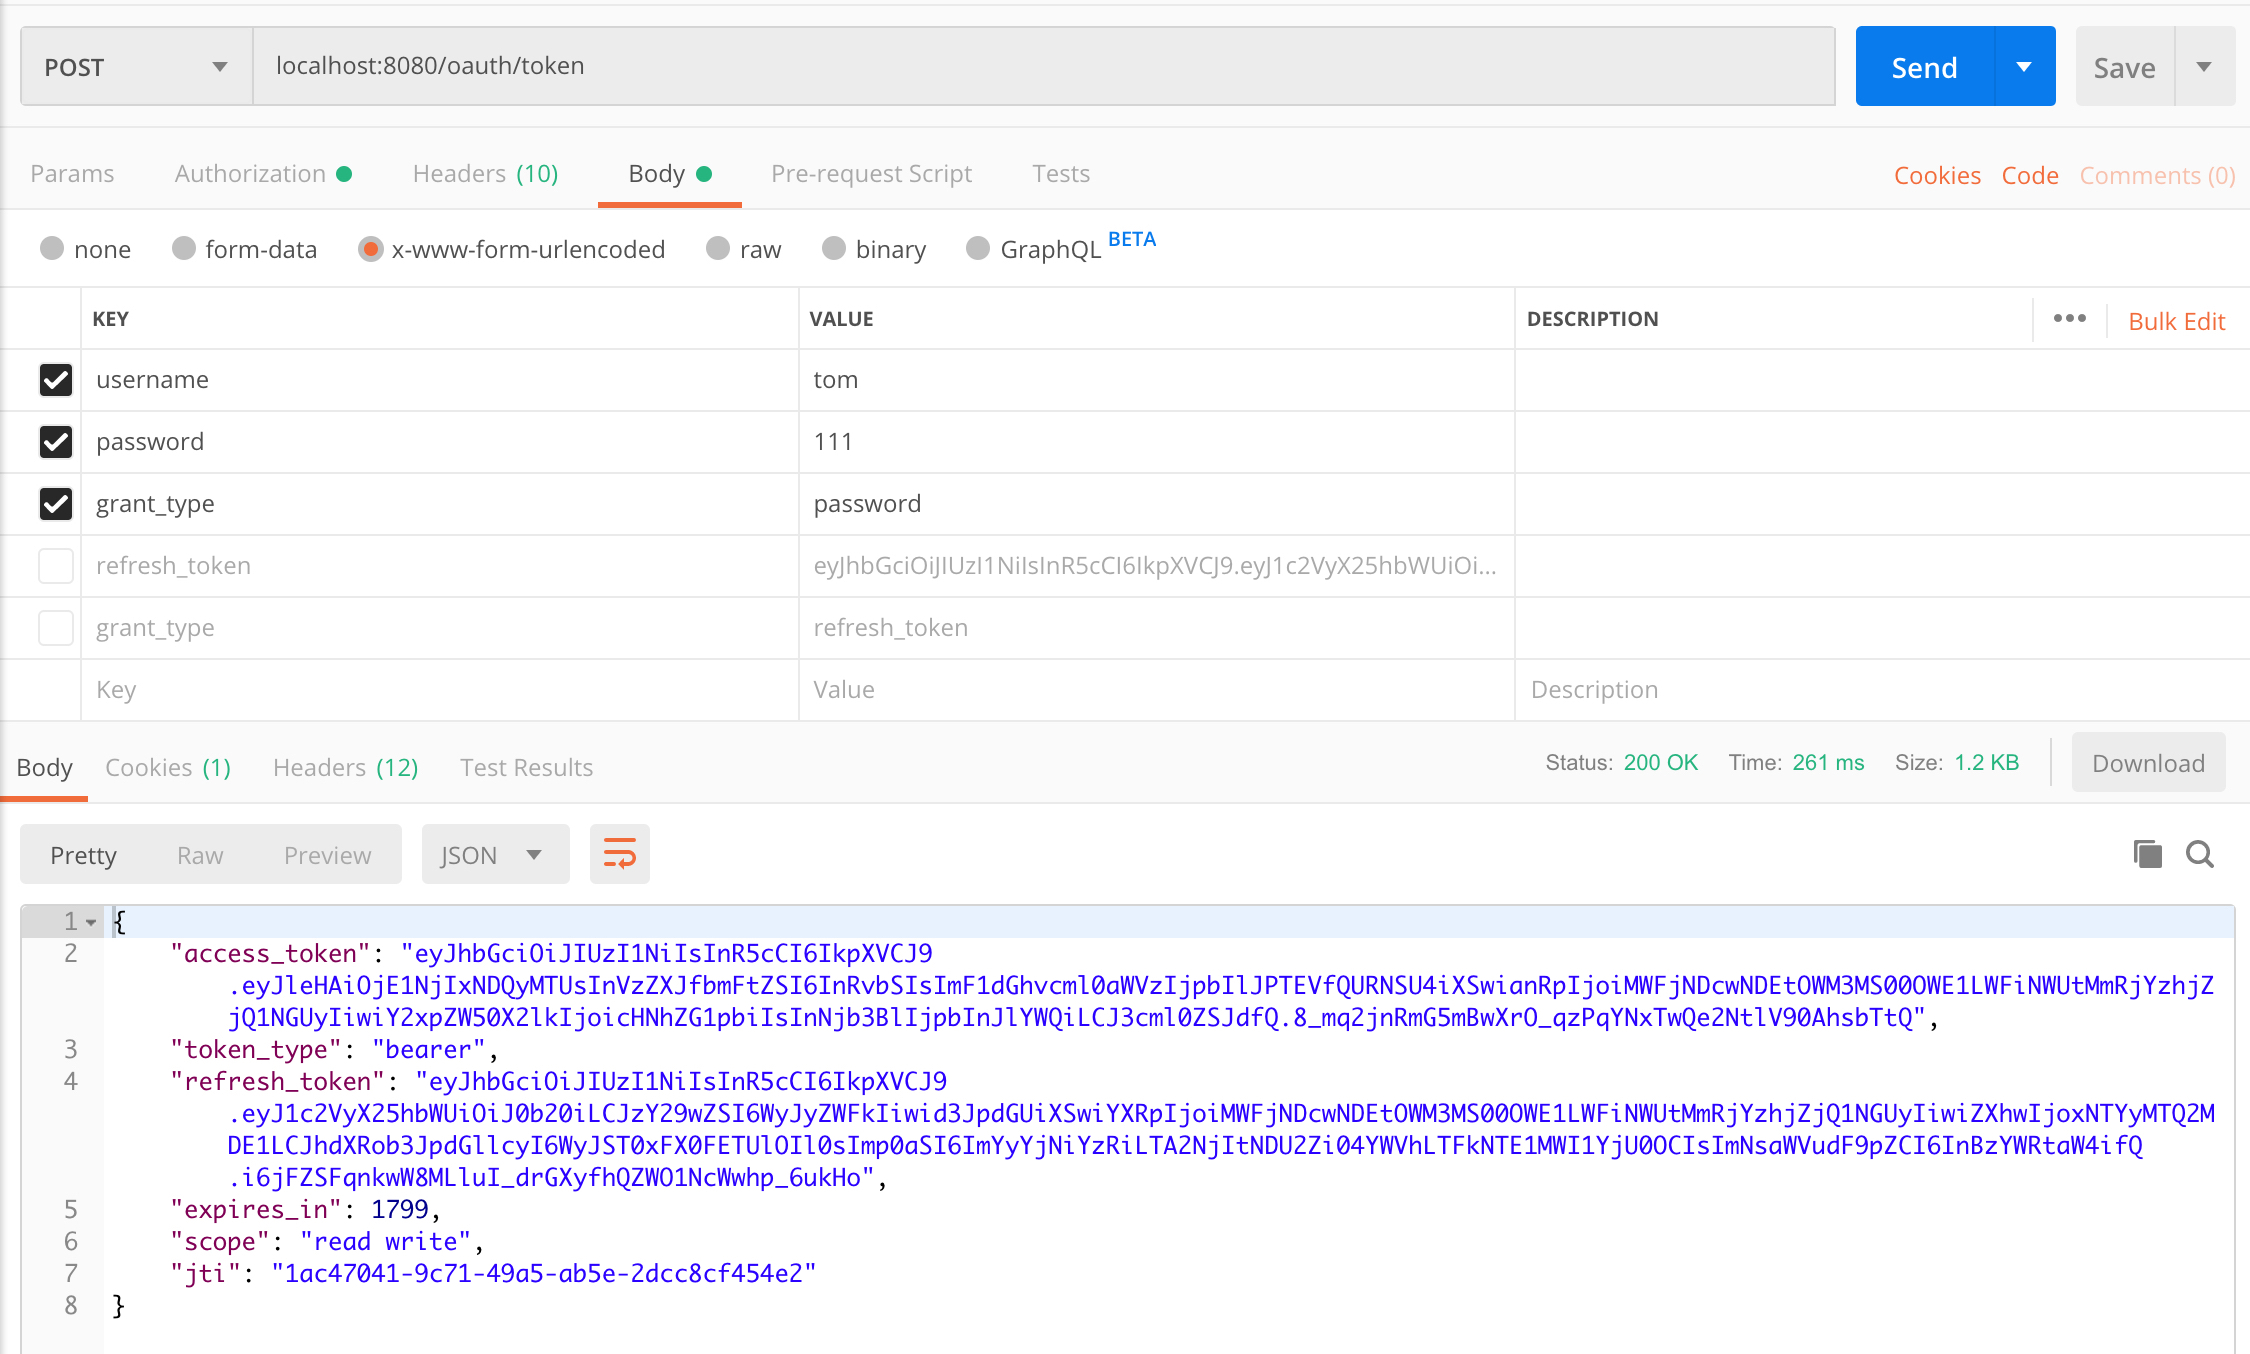
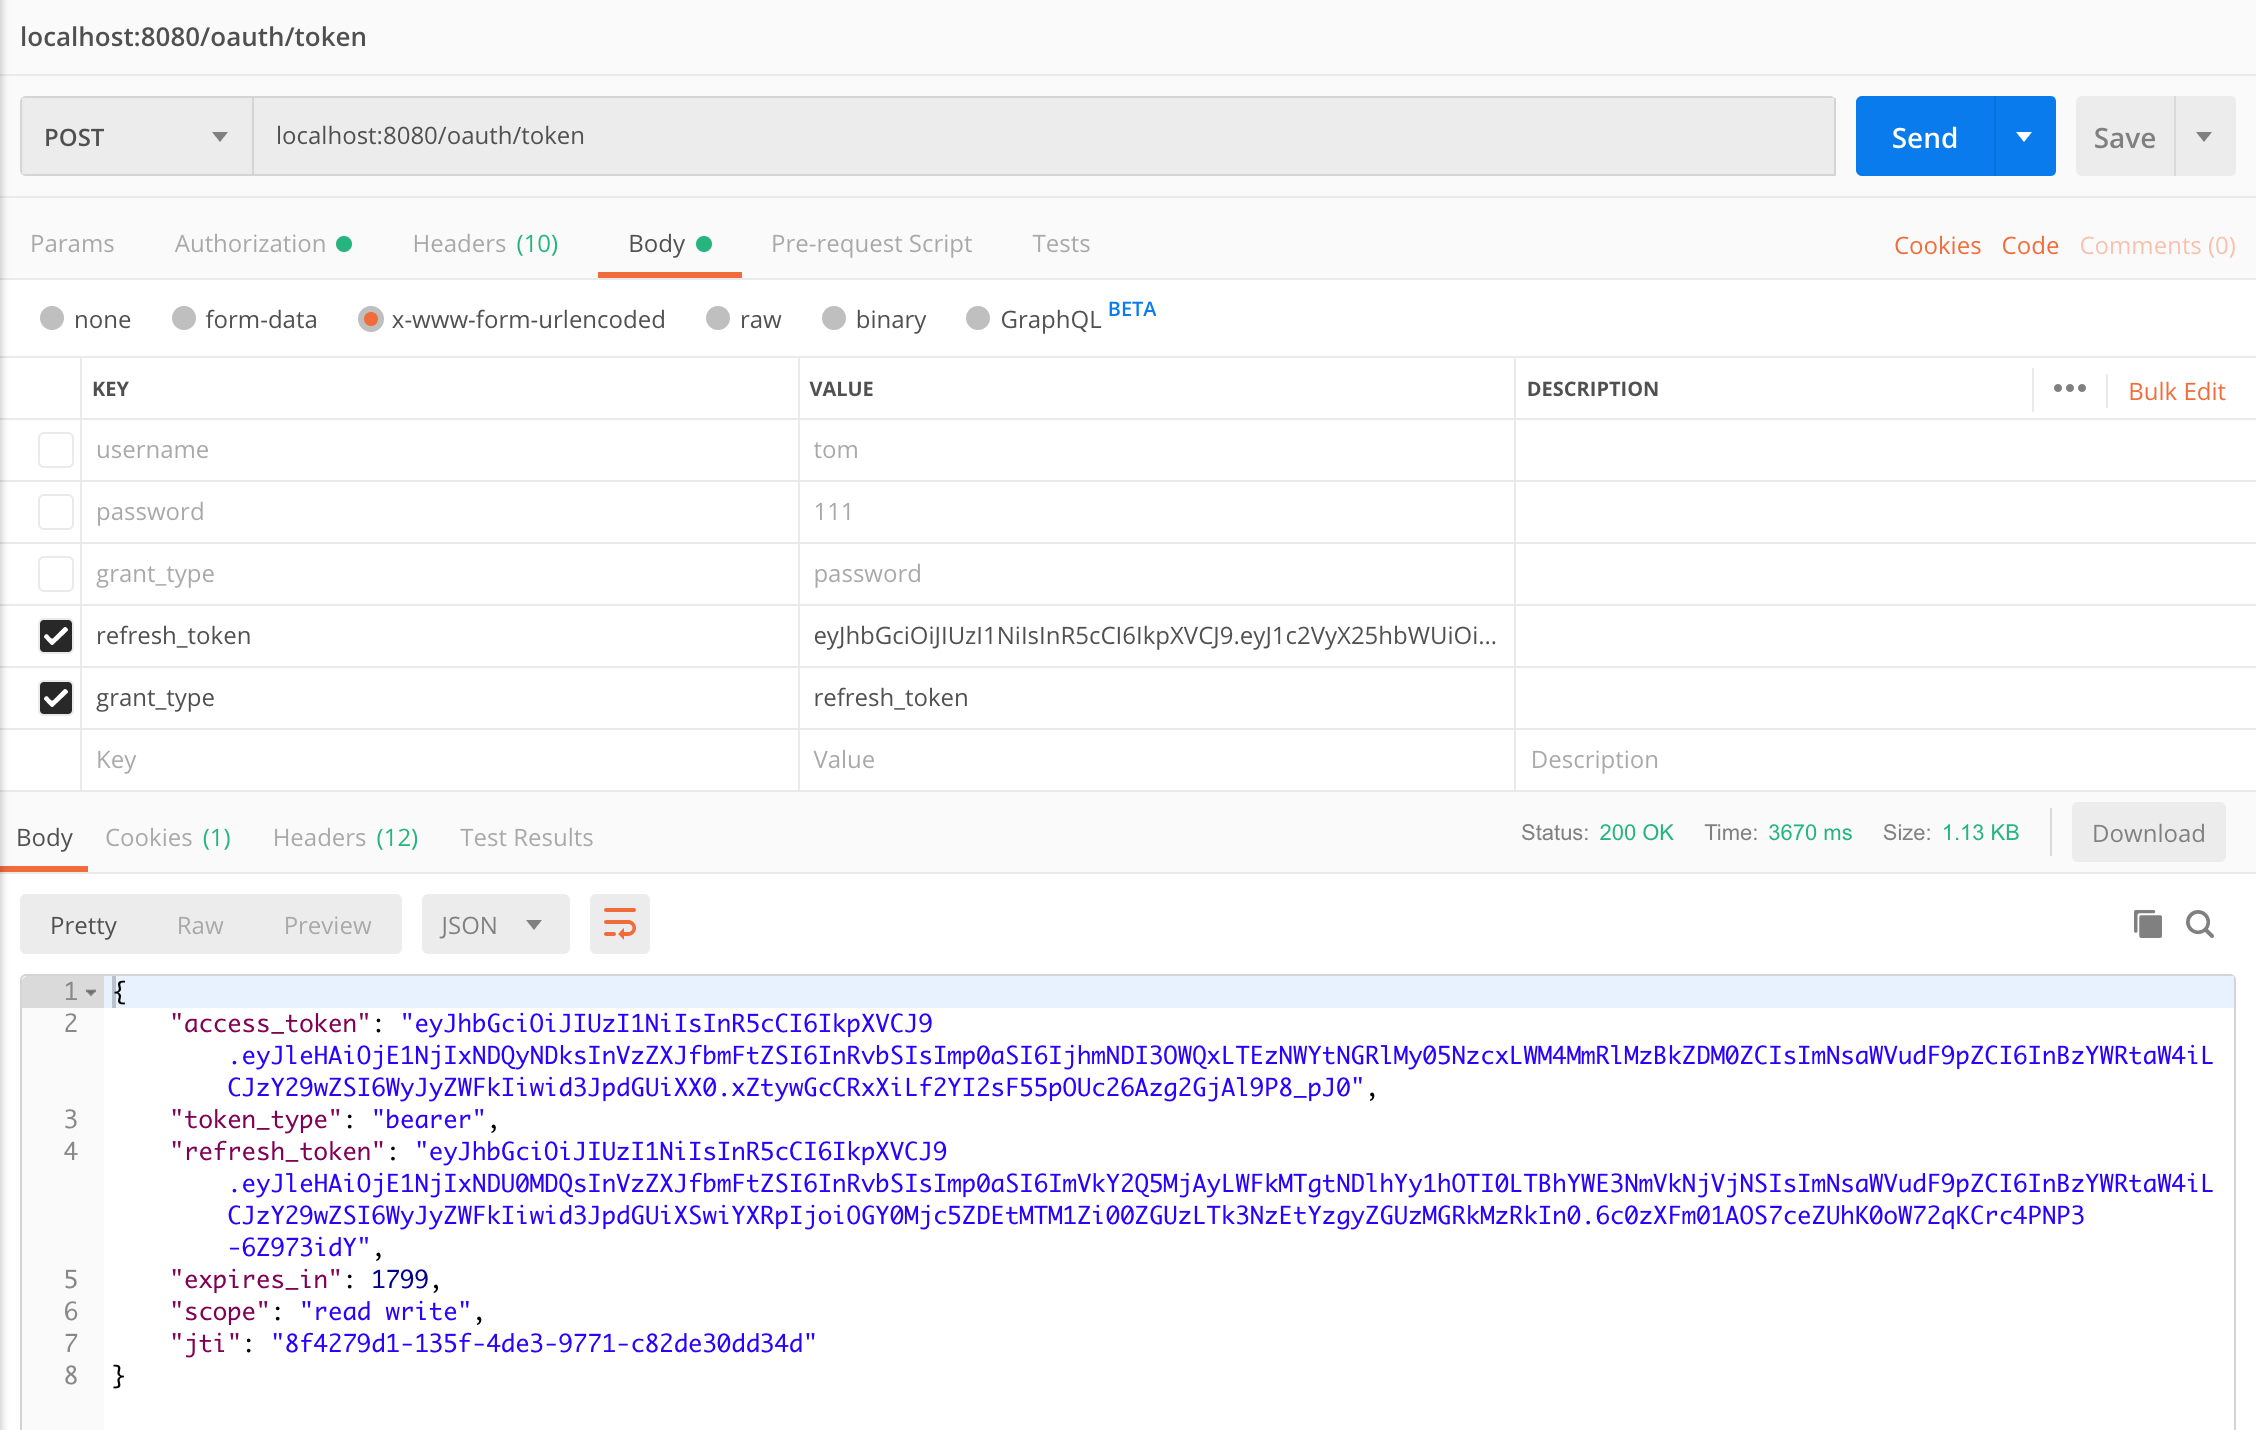
Postman
須先設定 username 與 password 即 resource owner 的 clientId 與 secret
取得 token
更新 token
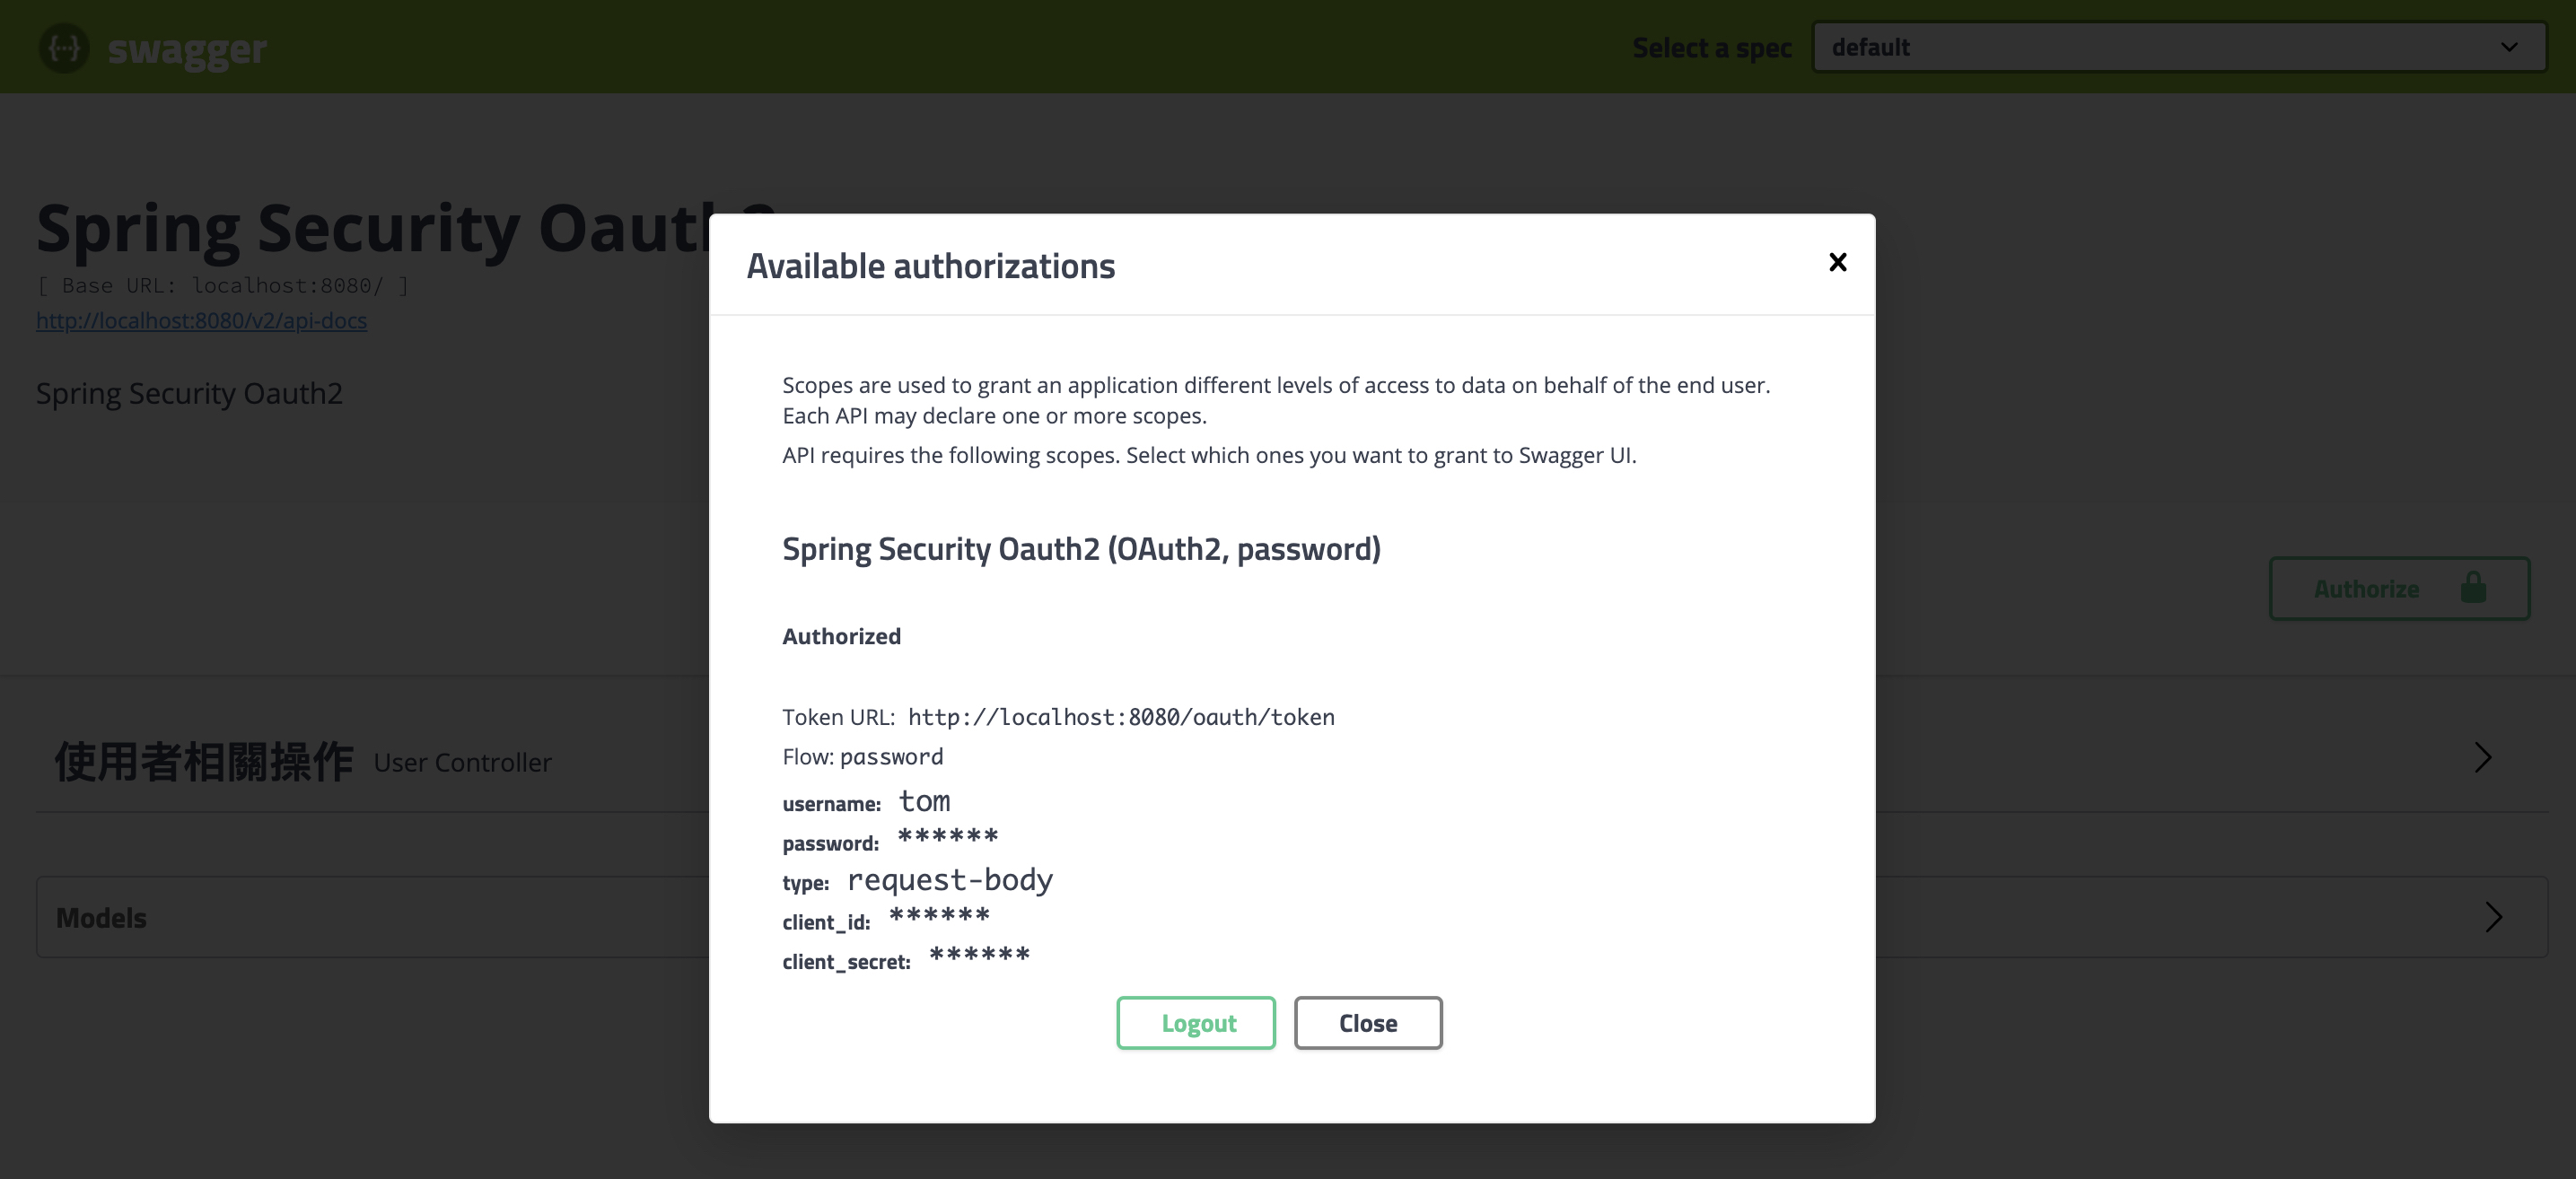
Swagger

Reference
Donate
謝謝您的支持與鼓勵